

The drive worked yesterday. Today it either does not appear on the desktop at all, or it appears just long enough to throw up a dialog saying the disk you inserted was not readable by this computer. Somewhere on it is a project you have not finished, or an archive you cannot replace.
Here is the useful thing to know before you start: most drives described as "corrupted" are not broken. They have file system damage, which is a bookkeeping problem rather than a hardware one. The data is still sitting on the platters or the NAND. What has gone wrong is the index that tells macOS where everything is, and macOS ships with everything you need to rebuild it.
What matters far more than which tool you use is the order you use them in. Repair tools write to the drive. If the drive is physically failing, the repair attempt can be the thing that finishes it off. This guide uses only Disk Utility, Terminal and Time Machine, all of which are already on your Mac, and it puts them in the sequence that gives you the best chance of getting your files back.
The short version
- Stop writing to the drive, and listen to it. Clicking or grinding means stop immediately.
- Rule out the cable, the port and the hub before you assume the drive is at fault.
- Check S.M.A.R.T. status in Disk Utility. That tells you whether this is a repair job or a recovery job.
- Copy your files off before running any repair, mounting the volume read-only if you have to.
- Run First Aid bottom up: each volume, then each container, then the device itself.
- If First Aid fails, use
diskutil repairVolumein Terminal. You do not need Recovery mode for an external drive. - Know the point at which further attempts cost you data rather than saving it.
Three rules before you touch anything
1. Stop writing to the drive. Do not move files onto it, do not let a backup app touch it, do not reformat it "just to see". Every write is a chance to overwrite something that was still recoverable.
2. Listen to it. Clicking, ticking, grinding, or a repeated spin-up and spin-down cycle means mechanical failure. Unplug it and skip to the section on calling a specialist. No amount of software will help, and leaving it powered on makes things worse.
3. Do not open it. On a spinning hard drive the read and write heads fly a few nanometres above the platter surface, while ordinary household dust particles are thousands of times larger than that gap. A single speck landing on the platter can turn a recoverable drive into a shredded one.
While you are here, protect the drives that still work
If you are reading this, the odds are that one of your drives is already in trouble. So it is worth saying the unwelcome part now rather than at the end: every drive you own is going to fail eventually. Spinning drives fail mechanically, SSDs wear out their cells, and both of them occasionally just stop being recognised one morning for no reason you will ever establish.
You cannot prevent that. What you can control is how much it costs you when it happens, and almost all of that cost comes down to a single question. Do you know what was on the drive?
If the answer is no, a failure turns into a week of guesswork: trying to remember which projects lived where, whether the shoot from last spring was ever copied across, whether the thing you have just lost exists somewhere else on the shelf. If the answer is yes, it becomes a short and manageable job. You know exactly what was on it, exactly which files you need back, and which of them are already safe on another drive.
Getting to yes takes about ten minutes per drive, and it has to be done before the failure. Scanning a drive once with DriveVault keeps a complete searchable record of everything on it on your Mac. The drive can then die, vanish, or sit in a recovery lab for three weeks, and you still have the list.
Scan each drive once and keep a searchable record of what is on it, so the next failure is an inconvenience rather than a mystery. Free for your first drive up to 4TB.
Download DriveVault FreeStep 1: Rule out the boring causes first
A surprising share of "corrupted" drives are perfectly healthy drives with a bad connection. Before you open any repair tool, work through these:
- Swap the cable. USB-C cables fail quietly and often, and many are charge-only or too slow to run a drive reliably.
- Go direct. Take the drive out of any hub, dock or monitor and plug it straight into the Mac.
- Try a different port. Ports on the same Mac do not always behave identically.
- Check the power. Bus-powered 2.5 inch drives are often right at the edge of what a port will supply, and desktop drives need their own adapter.
- Restart the Mac. This resets the USB controller and the disk mounting logic, which fixes more cases than it has any right to.
- Try another Mac. If it mounts there, the drive is fine and the problem is on your machine.
Step 2: Find the drive in Disk Utility
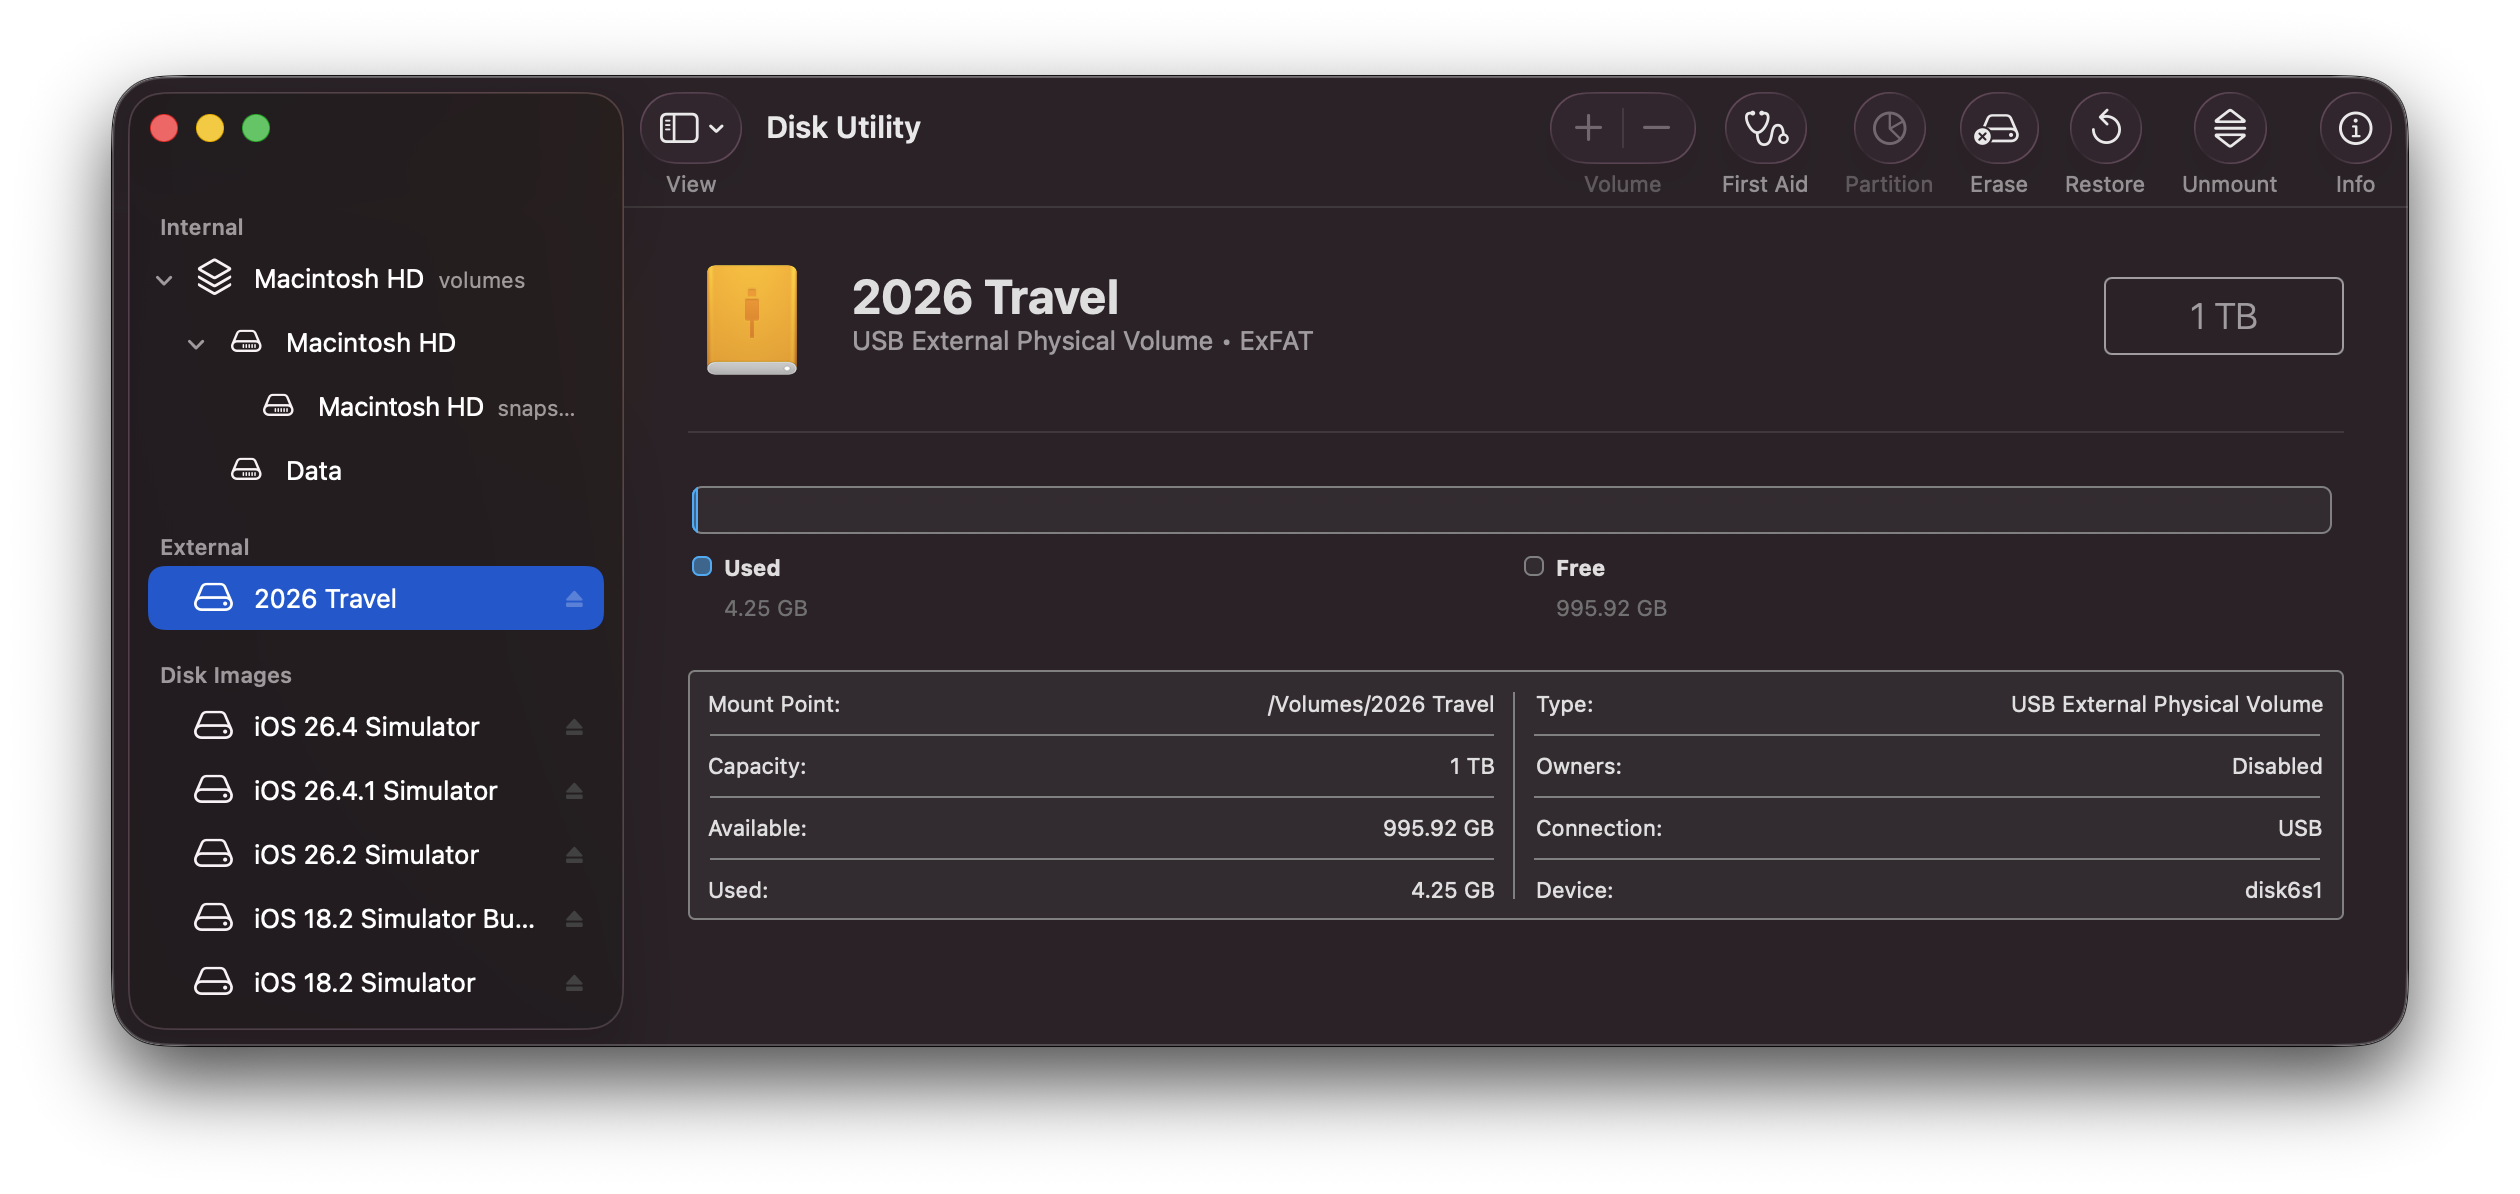
Open Disk Utility from Applications, then Utilities. The first thing to do is choose View > Show All Devices. Without it, Disk Utility hides most of what you need to see.
With it turned on, the sidebar shows a nested structure, and understanding it makes the rest of this guide much clearer:
- The physical device at the top level, named after the manufacturer, for example "Samsung Portable SSD T7 Media"
- The container underneath it, if the drive is formatted as APFS
- The volume or volumes inside that, which are the names you see in Finder
If the volume is greyed out, macOS can see the drive but cannot mount it. Select the volume and click Mount. If that works, go straight to step 4 and start copying files. If the physical device does not appear in the sidebar at all, no software on your Mac can help, and you are looking at a hardware problem.
Step 3: Check S.M.A.R.T. status before anything else
Select the physical device in the sidebar, not the volume, and look at the S.M.A.R.T. status shown in the panel below. This is the drive reporting on its own health, and it is the single most useful piece of information you will get in the whole process.
Verified means the hardware believes it is healthy. Your problem is almost certainly file system damage, and the repair steps below have a good chance of working.
Failing, or any variation on it, changes everything. Apple's own guidance is blunt here: if Disk Utility tells you the disk is about to fail, back up your data and replace the disk, because you cannot repair it. Do not run First Aid. Go to step 4, copy off everything you can, and treat the drive as disposable.
From Terminal: diskutil info disk4 | grep SMART gives you the same answer, replacing disk4 with your drive's identifier from diskutil list. Note that many cheap USB enclosures do not pass S.M.A.R.T. data through at all, in which case you will see "Not Supported" and simply have less information to work with.
Step 4: Get your files off before you repair anything
This is the step almost everyone skips, and it is the one that matters most. First Aid is a repair tool, which means it writes to the drive. On a drive that is physically struggling, that write can be the last thing it ever does.
If the volume mounts, even briefly or unreliably, start copying in Finder right now. Take the irreplaceable material first, not the largest folder. If the drive drops out mid-copy, reconnect and resume with the next most important thing rather than starting again from the top.
If the volume will not mount, try mounting it read-only. macOS often suggests this itself in the error dialog, and it lets you read the drive without allowing anything to write to it:
diskutil list
diskutil mount readOnly disk5s1
Run diskutil list first and substitute the identifier for your own volume. Step 6 below explains how to read that output and pick the right one, which is less obvious than it looks on an APFS drive.
If the drive mounts but keeps dropping out, make a full disk image of it and do your work on the copy. In Disk Utility, select the drive and choose File > New Image > Image from [device name]. Save the image to a healthy drive with enough free space. One limitation to plan around: Disk Utility cannot image individual APFS volumes or containers, only whole devices, so you need the space for the entire drive rather than just the used portion.
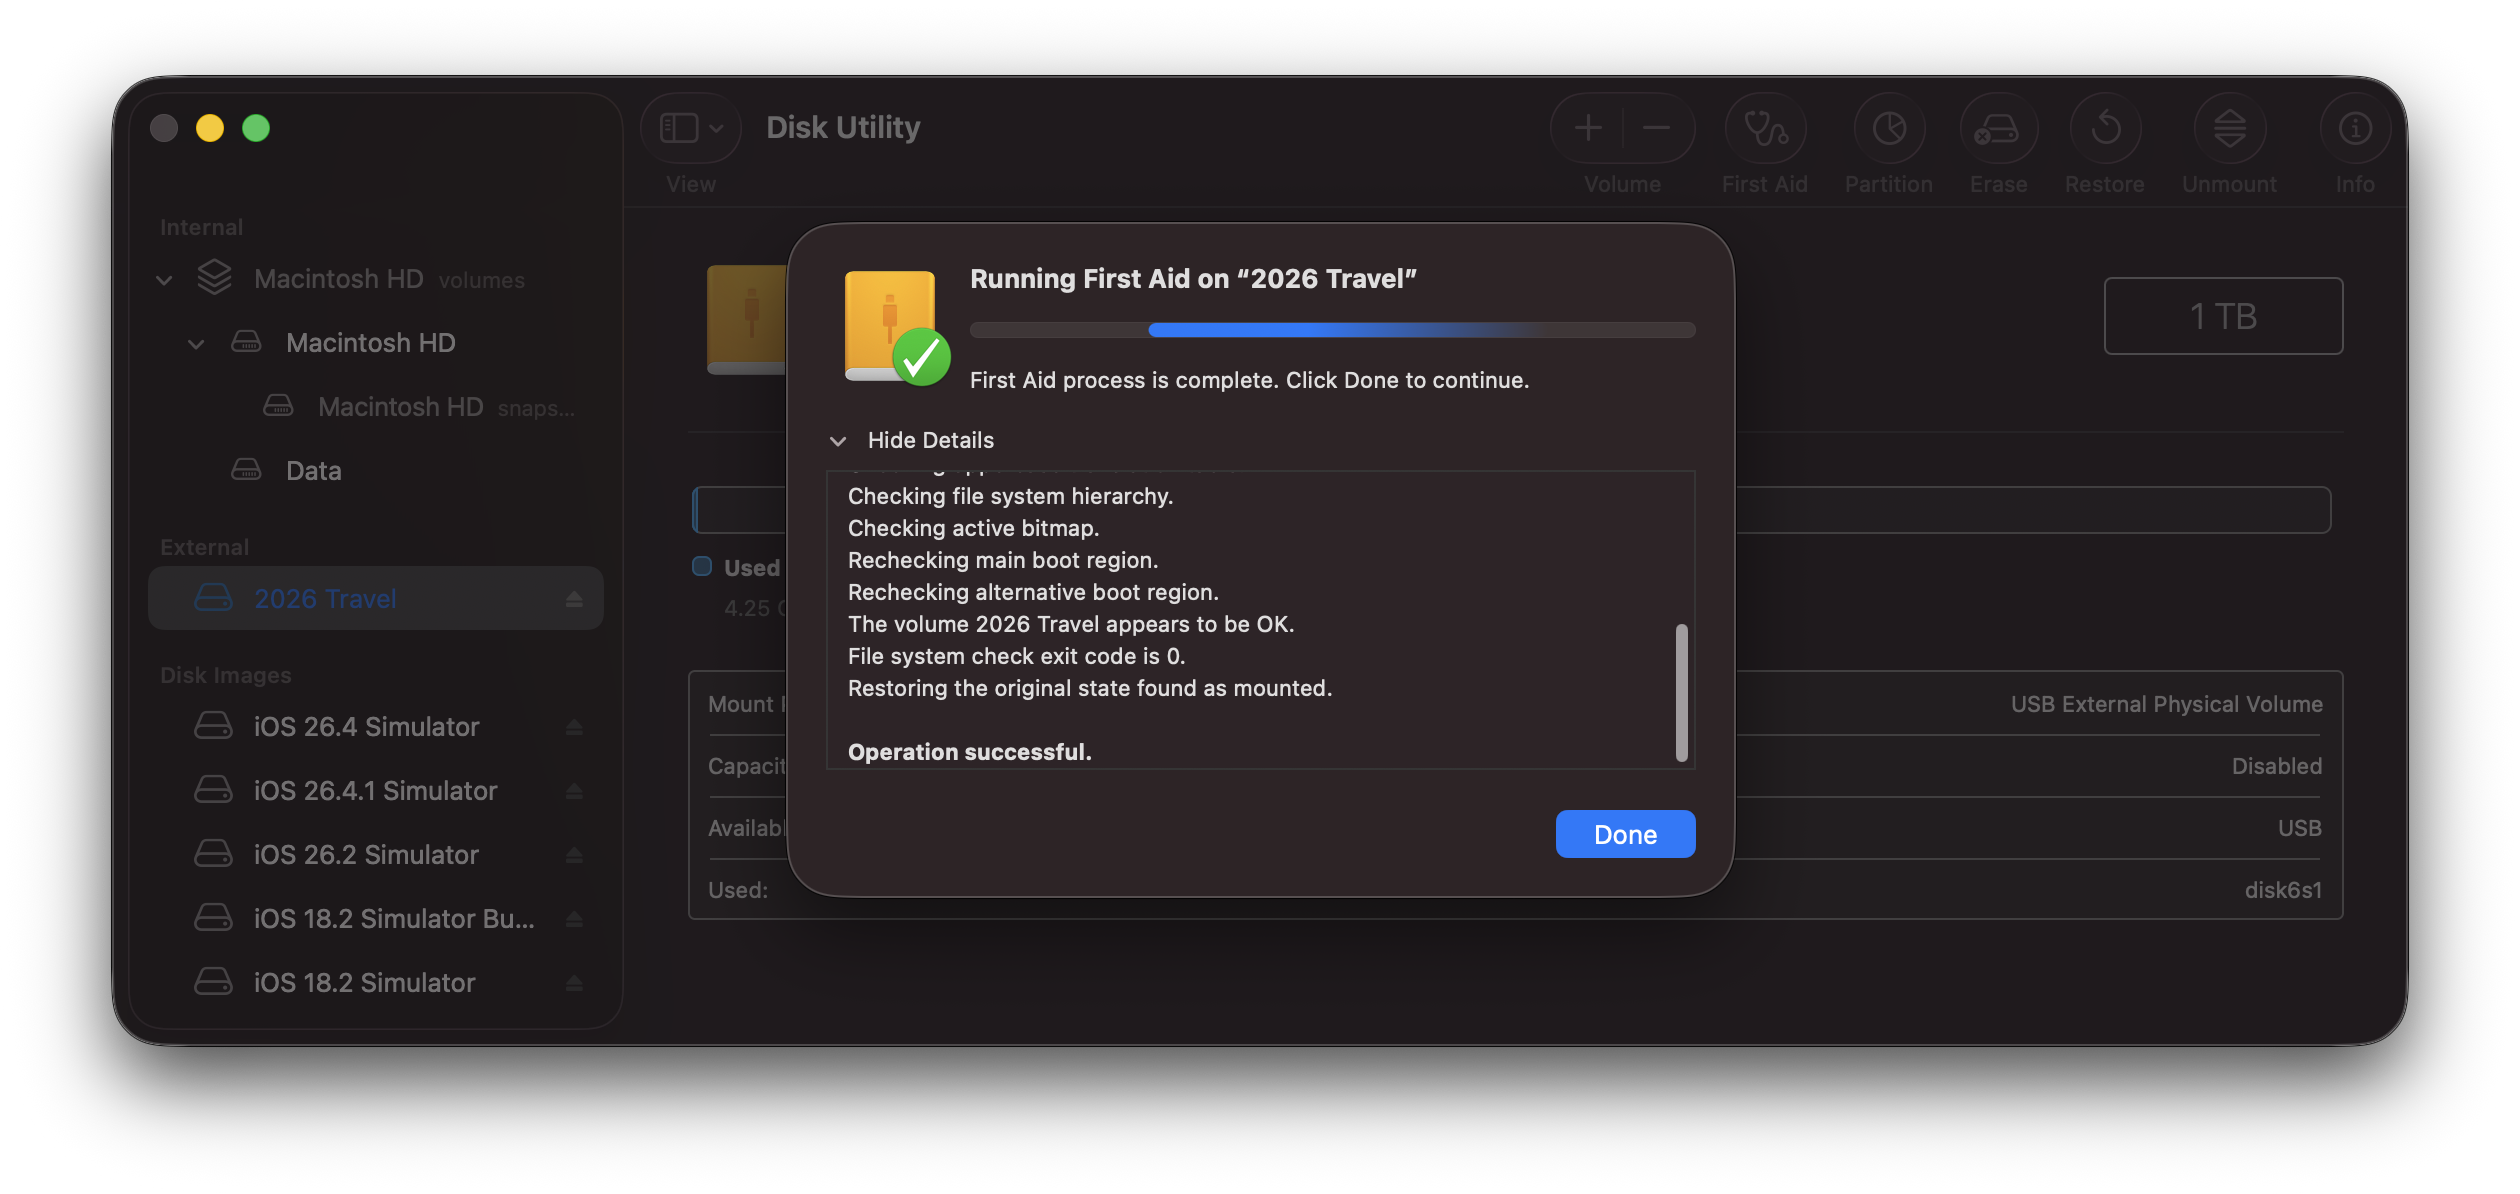
Step 5: Run First Aid, in the right order
Now you can repair. The mistake nearly everyone makes here is selecting one item in the sidebar, running First Aid once, and concluding that it did not work.
Apple's documented process is to work bottom up: run First Aid on each volume in turn, then on each container, then finally on the physical device itself. Each layer sits on top of the one below it, so repairing the volume while the container underneath it is damaged achieves very little.
The First Aid sequence
Work from the innermost item in the sidebar outwards, clicking Done between each run.
-
1Select the volumeThe indented item with the name you recognise from Finder. Click First Aid, then Run.
-
2Repeat for every other volumeIf the drive has more than one volume, do each of them before moving up a level.
-
3Select the containerPresent on APFS drives, sitting between the volumes and the device. Run First Aid on it.
-
4Select the physical deviceThe top-level item named after the manufacturer. Run First Aid one last time.
-
5Eject, unplug, reconnectA repaired volume often will not mount properly until the drive has been reconnected.
If First Aid reports errors it could not fix, run the whole sequence a second time before giving up. Apple explicitly recommends a second attempt, and repair passes are sometimes cumulative, with the second run able to fix what the first one exposed.
Step 6: Terminal, when First Aid gives up
Disk Utility is a front end for command line tools that are more capable than the interface lets on. Going to Terminal gives you better error messages and a repair pass you can repeat as many times as you like.
One myth to clear up first: you do not need Recovery mode or single-user mode to repair an external drive. Those exist because you cannot repair the disk your Mac is currently running from. An external drive can simply be unmounted, which is something you can do from a normal Terminal window. Single-user mode is also no longer available on Apple silicon Macs, so most of the older guides recommending it are out of date.
Start by identifying the drive:
diskutil listThis is the part that trips people up, so it is worth reading the output carefully. On an APFS drive it looks roughly like this:
/dev/disk4 (external, physical):
   #:              TYPE NAME              SIZE       IDENTIFIER
   0:  GUID_partition_scheme             *4.0 TB     disk4
   1:                EFI EFI              209.7 MB   disk4s1
   2:         Apple_APFS Container disk5  4.0 TB     disk4s2

/dev/disk5 (synthesized):
   #:              TYPE NAME              SIZE       IDENTIFIER
   0:  APFS Container Scheme -            +4.0 TB    disk5
                            Physical Store disk4s2
   1:        APFS Volume Archive 2024     3.1 TB     disk5s1
Find the block labelled (external, physical) and confirm it is yours by the size. That gives you the device, disk4 in this example. But the volume you actually care about is not on disk4 at all. It lives on the synthesized disk below, which macOS creates to represent the APFS container. Here it is disk5s1, the one carrying the name you would see in Finder.
The three identifiers you need, then, are the physical device (disk4), the container's physical store partition (disk4s2) and the volume (disk5s1). On an older Mac OS Extended drive there is no synthesized disk and the volume is simply disk4s2, which is why so many older guides give confusingly different numbers.
With the volume identified, verify and then repair it:
diskutil verifyVolume /dev/disk5s1
diskutil repairVolume /dev/disk5s1
These are worth trying first because diskutil handles unmounting for you and automatically selects the right repair tool for the format. A healthy result ends with a line telling you the file system check exited with a success code. Anything else, and the lines above it will name the specific structure that failed, which is exactly the detail Disk Utility hides behind a single red error message.
If repairVolume cannot fix it, drop a level and repair the whole container. Unmount the device first, then point the file system checker at the container's physical store:
diskutil unmountDisk /dev/disk4
sudo fsck_apfs -y /dev/disk4s2
Use fsck_apfs for APFS, fsck_hfs for Mac OS Extended, and fsck_exfat for ExFAT drives shared with Windows. The -y flag answers yes to every repair prompt. If the output ends with a message telling you the file system was modified, run the same command again. Keep going until it reports that the volume appears to be OK, or until two consecutive runs produce the same errors, which means it has done all it can and you should move on to the last two sections of this guide.
If you would rather not use Terminal at all, that is a reasonable position, and you are not missing a magic fix by skipping it. These commands are the same repair engine Disk Utility calls, just with better error messages and the ability to repeat a pass. If First Aid has already failed twice on a drive holding data you cannot lose, going straight to a recovery lab is a perfectly sensible decision.
Step 7: Check Time Machine, carefully
If the drive is beyond repair, Time Machine may already have a copy. There is one detail that catches almost everybody out, though: Time Machine excludes external drives from backups by default. Connecting a drive does not add it, and you have to have removed it from the exclusion list yourself under System Settings, General, Time Machine, Options.
If you did that at some point, enter Time Machine, browse back to a date before the drive failed, and restore. If you did not, there is no backup of that drive, and it is worth going and fixing that for the drives you still have.
Step 8: Know when to stop
Every repair attempt on a physically failing drive costs you something. These are the signals that the next thing you try should be a phone call rather than a command:
- S.M.A.R.T. status reports Failing
- The drive clicks, ticks, beeps or repeatedly spins up and down
- The drive vanishes from Disk Utility partway through a copy or a repair
- First Aid fails at the same point on repeated runs
- The physical device never appears in Disk Utility at all, on any Mac, with any cable
A professional recovery lab is not just running the same tools with more confidence. They image the drive on hardware that can retry individual sectors, work around damaged areas, and read the platters directly if the drive's own electronics have failed. They start from a clone, which means nothing they try can make your situation worse. That is the thing you cannot replicate at a desk.
The part that is much easier to do beforehand
When you call a recovery lab, one of the first questions is what you need back. It is a reasonable question, because it determines the scope of the work and therefore the quote. Recovering one specific project folder is a different job from recovering four terabytes of unsorted material.
Almost nobody can answer it. The list of what was on the drive was on the drive.
This is the case for cataloguing drives while they still work. DriveVault scans a drive once and keeps a searchable record of everything on it on your Mac. Every folder, every filename, every size and date. The drive then goes back on the shelf, and the catalogue stays.
When a drive later fails, that catalogue is the difference between guessing and knowing:
You can scope the recovery
Hand the lab an exact list of the paths and files you need rather than asking them to recover everything, which is usually the difference between a targeted quote and an open-ended one.
You know if it even matters
Sometimes the failed drive turns out to hold nothing you do not already have somewhere else. Recovery quotes are expensive things to accept unnecessarily.
You can find the duplicates
Drive Comparison checks the lost drive's catalogue against your other drives and shows exactly which files exist elsewhere and which genuinely only lived on the one that died.
You have something to show
For an insurance claim, a client conversation or a colleague who needs to know what was affected, a file listing is far more persuasive than a description from memory.
DriveVault scans each drive once and keeps everything searchable on your Mac, whether the drive is plugged in, on a shelf, or in a recovery lab. Free for your first drive up to 4TB.
Download DriveVault FreeFrequently asked questions
Will running First Aid delete my files?
First Aid is designed to repair the file system rather than erase data, and in normal use it does not delete files. It does write to the drive, though, which is why you should copy off anything irreplaceable before running it, particularly if S.M.A.R.T. status is not Verified.
Disk Utility says my drive cannot be repaired. Is the data gone?
Not necessarily. A failed repair means macOS cannot rebuild the file system to a state it trusts, but the underlying data is often still present. Try mounting the volume read-only from Terminal to copy files off, and if that fails and the data matters, a recovery lab can usually read far more than macOS can.
Do I need to boot into Recovery mode to repair an external drive?
No. Recovery mode exists so you can repair the disk your Mac is running from, which cannot be unmounted while macOS is using it. An external drive can be unmounted normally, so Disk Utility and Terminal both work from your regular desktop session.
What is the difference between erasing the drive and repairing it?
Repairing attempts to fix the existing file system and keep your files. Erasing writes a fresh empty file system over the top, which reliably makes the drive usable again and reliably loses everything on it. Erasing is the last step, never the first one, and only after you have copied off everything you can.
Can I recover files from a drive that macOS will not mount at all?
Sometimes. Try diskutil mount readOnly from Terminal first, since a read-only mount bypasses some of the checks that block a normal mount. If the drive appears in diskutil list but no mount succeeds, the file system structures are badly damaged and recovery becomes a specialist job.
How do I stop this happening again?
Eject drives properly before unplugging, keep two copies of anything irreplaceable, replace spinning drives after roughly four or five years of regular use, and keep a catalogue of what is on each drive so that a failure is an inconvenience rather than a mystery.
The honest summary
Most corrupted drives on a Mac are fixable, and fixable with software you already have. Check the cable, check S.M.A.R.T., copy your files off, then run First Aid bottom up and fall back to diskutil repairVolume if it fails. That sequence resolves the large majority of cases.
The ones it does not resolve are hardware failures, and the useful skill there is recognising them early enough to stop. A drive that is clicking does not need another repair attempt. It needs to be unplugged.
And the question you will be asked either way is what was on it. That one is much easier to answer if you decided the answer in advance.